
Abstract Coral Generator
This post was inspired by Adam Pizurny (see post here). I wanted to see if I could recreate a method of copying randomly varying geometry to a set of points. I also wanted to get objects packing together whilst mostly preserving volume through vellum. I also wanted to dip my toes into mantra rendering as I had not approached this before. Lets get creepy!
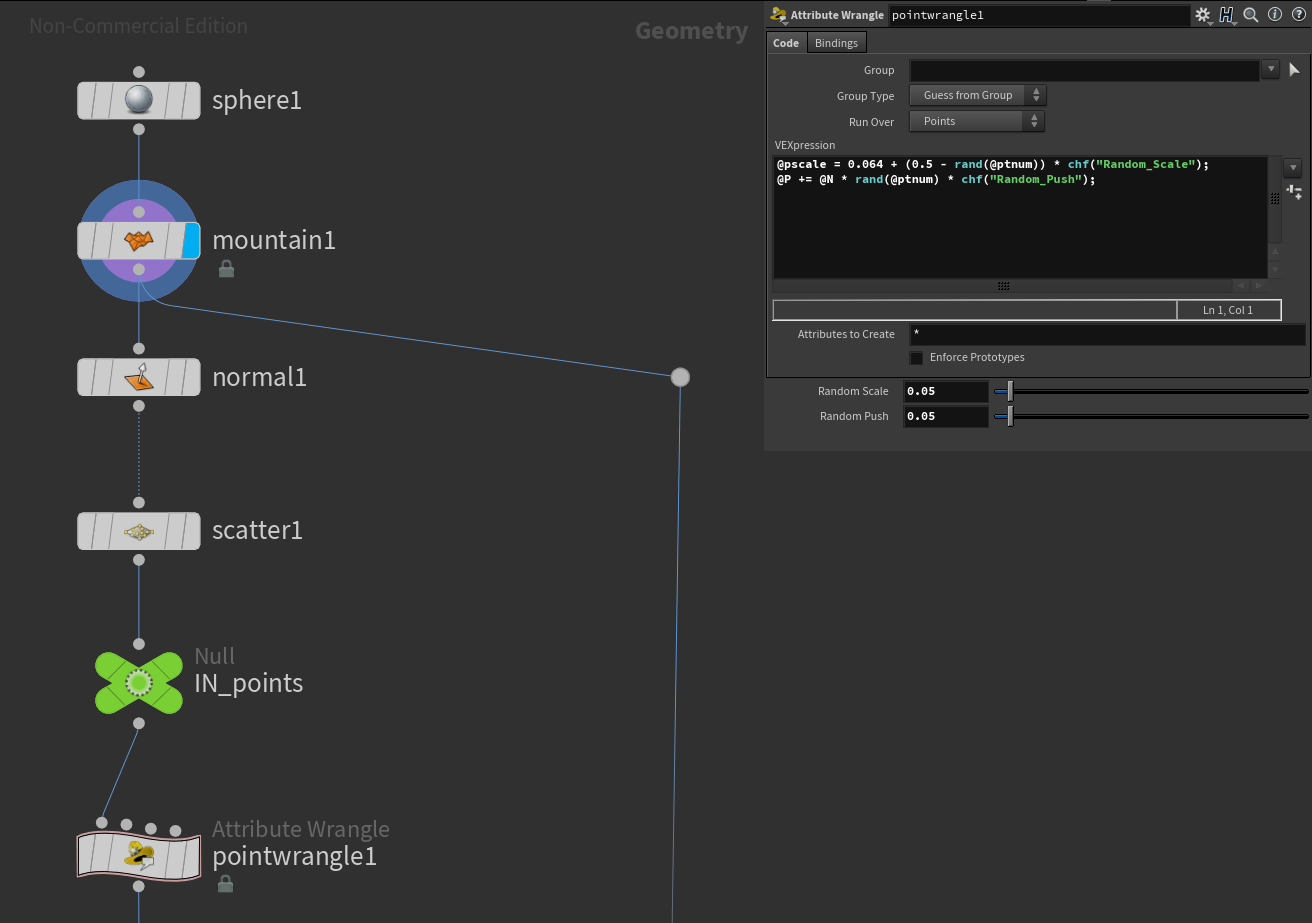
Starting with a sphere as the base shape, attach a mountain with low height and low roughness for the base, just for some subtle variation. Link this to a normal node, this ensures that any objects you scatter onto the sphere will have their orientation changed as well. Scatter some points evenly (start small) on the sphere and assign a few variables you want to control. For this, I set a pscale with a given value, and randomly vary about that by a given scale. I also pushed out the position by a small amount along the normal. This allowed the objects to overlap each other more nicely, however did introduce some floating objects as seen above.
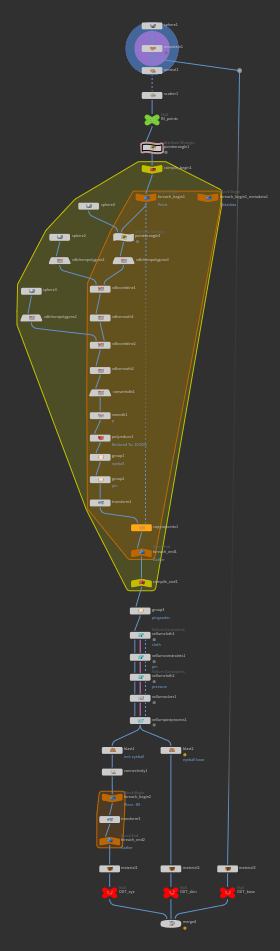
Overview of the whole network. For loops look pretty terrible most of the time.
As you can see from the network graph, the next step is creating an overkill for-each-point loop, so ill break it down into steps.
Create a compile loop, and place a for-each-point loop inside. This loop operates asynchronously so will benefit from the compile nodes.
Duplicate the foreach_start node and set one to fetch metadata. This is so that the reference to the iteration number can be retrieved.
Create two spheres, one to serve as the basis, the other to cut a volume out of it.
Plug one into a point wrangle, and increase the y position by the maximum amount you want to cut out of the other. E.g. no increase will cut the whole sphere.
Randomly increase y by a given amount, with the random seed based on the current iteration.

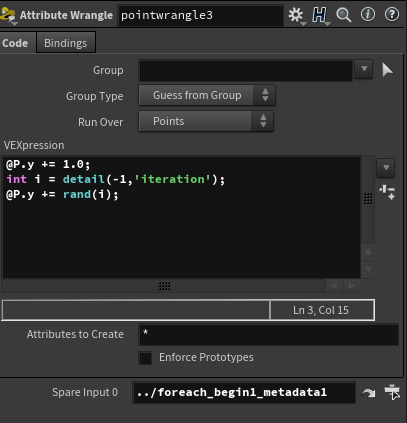
To get metadata references, click the settings cog on the point wrangle and select “add spare input”, then drag the metadata node onto the new field.
Convert both spheres to VDBs, then combine using SDF difference. Smooth this to get rounded edges.
Create another sphere, at a scale of 90% the other spheres. This will be the ‘eye’ and so must be slightly smaller.
Combine this with the previous result using SDF union, smooth again, convert to polygons, then use a poly reduce for better efficiency.
Create a group for the “eye” using a bounding sphere, and create a small group at the base of the sphere, which will be used to pin the object in place later.
Now copy to points, using the input of the foreach begin node.
*note: the sphere creation is kept outside the for loop as they do not change between iterations.

Now there should be randomly varying geometry copied to each of the given points. Cool beans! Now to make the next step easier, play around with the scatter and seed to get a good looking initial distribution with no overlaps.
After the compile node, a new group called “pin” was created, merging the base and eye groups defined before. Plug this into a vellum cloth, defaults settings are fine. Plug this into a pin constraint, referring to the newly created group. The eye was included in this group, otherwise it would bulge out and look a few different kinds of wrong. Plug into a vellum pressure, making sure to check output group. Connect to a vellum solver, set gravity to 0 and jump inside. Create a vellum constraint property node, set group to pressure, and connect to the output. In here, you can animate the rest length scale, I set it to 1 + $FF * 0.05. This will inflate each object a small amount each frame.
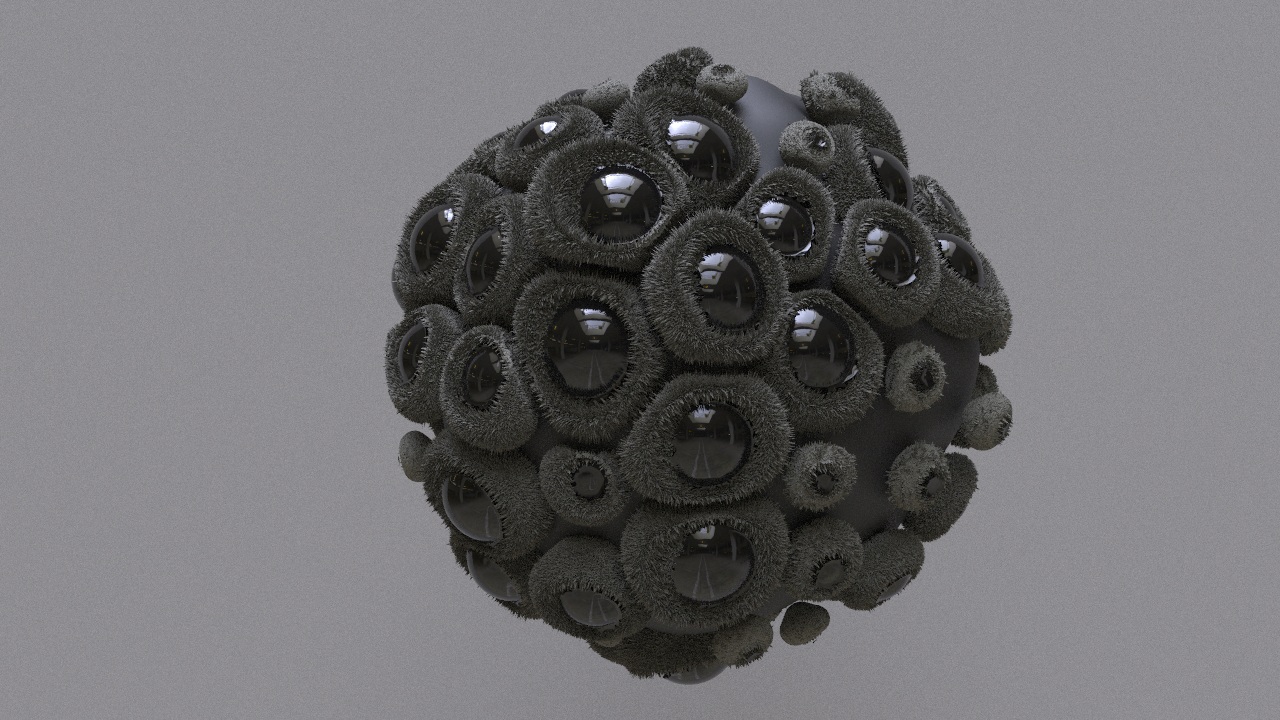
SQUISH
And there you go. From here, you have the different material groups to split out and render. Note that the connection between the eyes has become distorted after this process, and so the material grouping is no longer perfect. There is definitely a better way to do this.
HIP friends