
Houdini to UE5 Tornado
So I finally pulled myself away from playing Elden Ring, just so I could try remake stuff from it. Getting to the area Crumbling Farum Azula, you will see striking tornadoes everywhere in this cloud-top environment. This is my take on recreating this effect in UE5 (this technique is also applicable to UE4, I just wanted an excuse to dive into the new engine). This uses Houdini 19, but can be used in older versions. See the resources at the end for HIP file download.

UE5 render

Elden Ring clip
Houdini
Starting with a tube shape, I project UVs using a cylindrical projection correcting for scale so it is properly centered. I also saved the height of the tube to a vertex colour attribute before the mesh is deformed so I could access this in Unreal if wanted, and apply a secondary large-scale noise later to get those larger s-curves. I also wanted clean UVs for use in Unreal, to easily apply texture and normal detail using the same principles applied in Houdini.

The crux of this tornado is generating a diagonal noise that rotates around the cylinder and flows up the mesh. Testing first on a grid, one way to do this is to generate a manipulated position for the noise node to use. In this instance, we can calculate x as x + z, and z as x - z. These components can then be scaled at different points to stretch, rotate, or shear the resulting noise pattern.
Diagonal Noise
Similarly, we can use this noise generation technique to run the noise in UV space on the cylinder. As these are already in a cylindrical projection, it will make the task much easier. Firstly, I used a ramp to scale the tube by its normals to flare out the top for a better base shape.
Promoting UVs to points, we can use UVx + UVy as an x coordinate, and UVx - UVy as a y coordinate, leaving z unused, and scale these components to get the direction and stretching desired. One issue however, is that there is a seam formed from the cylindrical projection. To alleviate this, I generated a second attribute, that uses the same properties, but is offset by 0.5 along UVx. This can then be used to blend the 2 noises together over the seam.

To deform the mesh using these noises, I pushed out along the normals generated before the tube was flared out, this will restrict the movement to x and z directions, as this look doesn’t work well also deforming along z. Making the mask for noise blending, we want a smooth value around the tube, avoiding a discontinuity at the seam. By offsetting uvx by -0.5, multiplying by 2, and taking the absolute value, it will form the V-shaped mask we want to lerp the noises.

Noise running over the manipulated UVs, showing the seam

Lastly, we curve the whole mesh using the height as noise input, make a 100 frame loop with the labs tool, and cleanup before exporting as an alembic cache. Note to scale up 100x, otherwise it will come in too small to unreal, which results in point precision errors and will be full of artifacts. Also smoothing the normals by increasing the cusp angle to 180 degrees will produce a cleaner result. This method produces quite a large file size, and there are other techniques to explore, but for a more efficient file, try reducing the loop length and the mesh density.
Unreal
Bringing into Unreal, import as a geometry cache, and set conversion preset to 3ds Max for correct orientation. Take note of the first frame, if that isn’t set to the first frame out of Houdini, you will end up with a larger cache size, and will crash in older Unreal versions.
I wanted to initially set this up in the Valley of the Ancient demo, however I couldn’t get the project to compile in UE5 preview 2, so instead I started by bringing these into a new level with the open-world preset, which is a decent looking testing ground for large scale FX like this.
Making the shader relies on very similar principles for the surface distortion in Houdini. For the base colour, the texture coordinates are rotated diagonally, stretched, and sample a noise. This is used to lerp between 2 colours, red and blue here just for clarity in the master shader, but will be made very similar in the material instance for subtle variation. Likewise for normals, the uvs were manipulated, and used to sample 2 seperate textures with different scales for more variation. Similarly the surface distortion could be done in Unreal shaders through world position offset rather than Houdini, but more care would be needed to be put into the noise generation or baked textures, along with increased shader complexity, so depends on the project for which method works best.

Base colour

Normal mapping
There are some issues to contend with when working with translucent meshes, particularly at this scale. One issue is being able to see the tornado geometry through itself, even when fully opaque. At large distances there can be some issues with resolving the depth of particular faces. This can be resolved with a trick that utilises custom depth to hide the broken pixels more effectively (Check resources for more details).
Also, there are more issues that arise with sorting translucent objects, particularly problematic is that the translucent particles rotating around the tornado won’t be correctly resolved in-depth, I may detail some methods to alleviate this in part 2.
Making the mesh masked and using dithering is another way to solve translucent sorting issues, however this can be challenging to make look decent. There are also some post process methods to explore too, but for now I will leave this as an opaque mesh.

Opacity / Opacity Mask
Placing the tornado into scene, it felt a bit too bare without additional particles at the base, so I threw together a quick Niagara system for this. I wont go into detail, but I will show a few quick tips.
Check Sub UV Blending Enabled on the sprite renderer for smooth flipbooks when working with flipbook particles that have longer lifetimes
On system properties, change Warmup Tick Count to have your particle system start partway through
To increase shadow rendering distance on particles, set r.TranslucencyLightingVolumeOuterDistance = 10000 or higher. This however was particularly unstable in UE5 preview 2
If particles themselves don’t look good when casting shadows, you can duplicate the system, hide one, and check “Hidden Shadow”
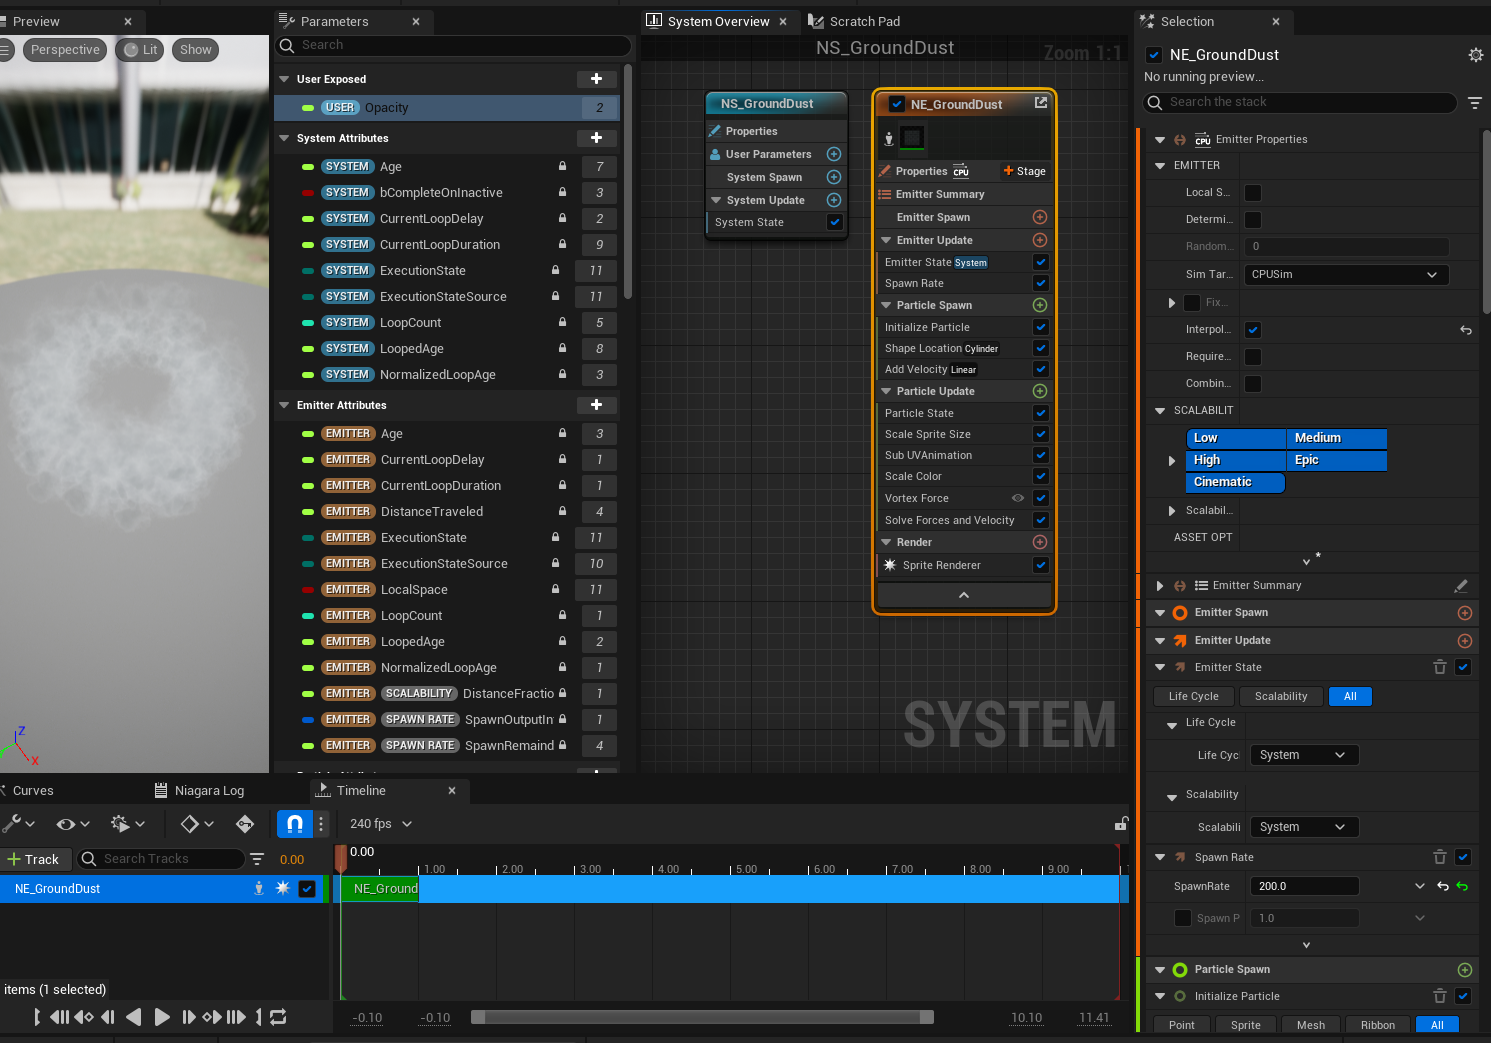
Niagara system

Niagara system dragged into scene / Cast Shadows enabled and LightingVolumeOuterDistance increased / Cast shadows and hidden shadow enabled on hidden particle, with lower particle opacity
Render
I plan make a part 2 to this post (or more), where I improve on elements of the tornado (such as adding debris), figure out the cloud system, improve the lighting, and create my own landscape and set dressing through Houdini. Working in UE5 has been great, there are so many cool new features, and I love the new UI. However the preview 2 release is still quite unstable, I crashed many times working on this, so hopefully a lot of these get ironed out before the full release. I also got the mesh imported as a vertex animated texture using the new labs VAT softbody workflow, which I may also detail more later.
Resources
The noise textures I used were from Luos’ Noise Texture Pack, having a library of noise textures to use makes look development a lot easier and is enough for the majority of use cases.
The flipbooks used for the ground dust were from the Realistic Starter VFX Pack Vol 2
Check out this video that explains the opacity culling in more detail (I use this technique all the time so super handy to know it well)